Table of Contents
ConfigServer Security & Firewall (CSF) is the default firewall installed on Liquid Web servers. If you suspect a client or customer’s IP address has been blocked by the firewall, you can resolve the issue easily in WHM and the ConfigServer Firewall. CSF is managed through WebHost Manager (WHM), this tutorial will take you through how to unblock and whitelist IPs.
CSF is found in the Plugins section of the WHM home page. Once you click on the Plugin icon, you can select ConfigServer Security & Firewall. This will open the options within the firewall and allow you to block, unblock and whitelist IP addresses and much more.
Two ways to whitelist your IP address:
- Using WHM
- Via Command Line
Steps to Whitelist your IP in WHM:
- Access CSF in WHM (Web Host Manager):
- Log in to WHM with your administrator credentials.
- Navigate to the “Plugins” section and click on “ConfigServer Security & Firewall” (CSF) or search for “CSF” in the search bar.
- Login to CSF:
- Once inside CSF, you may need to log in if prompted. Use your WHM or root administrator username and password to log in.
- Allow IP Address:
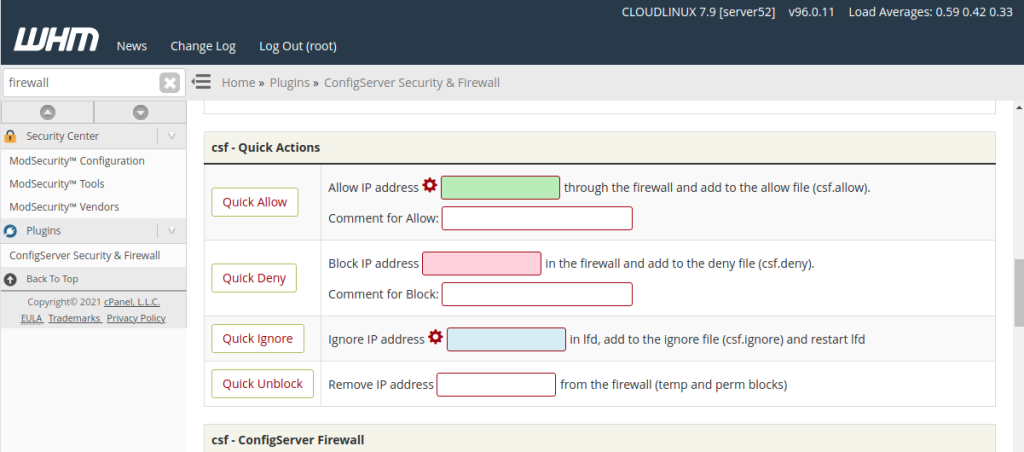
In the CSF dashboard, locate the “Firewall Configuration” section or similar.
Look for an option like “Quick Allow” or “Add IP to Whitelist.”
Enter the IP address you’d like to allow. This will allow the IP address through all ports, but it can still trigger lfd and multiple modsec rule violations. Click on Quick Allow to allow the IP address through the firewall.
Click on the “Add” or “Quick Allow” button to add your IP address to the CSF whitelist.
4.Verify IP Allowance:
- After adding your IP address to the whitelist, you should see a confirmation message indicating that the IP has been allowed.
- Additionally, you can check the CSF “Allowed IP addresses” or “Whitelist” section to verify that your IP address is listed.
5.Restart CSF:
- To ensure that the changes take effect, you may need to restart CSF.
- Look for an option to “Restart CSF” or “Apply Changes” within the CSF interface and click on it to restart the firewall service.
6.Test Access:
- After allowing your IP address in CSF, test access to the services or applications that were previously restricted.
- Ensure that you can access the website, cPanel, FTP, SSH, or any other services without being blocked by the firewall.
To whitelist an IP address from the command line:
- Access the command line as the ‘root’ user via SSH or “Terminal” in WHM.
- Use the csf command with the -a switch and the IP address to whitelist.
csf -a ipaddress
csf -g 192.0.2.0

To remove a permanent IP block, use the following command:
csf -dr 192.0.2.0
The output will show that the IP was successfully unblocked:

Conclusion:
By following these steps, you should be able to allow your IP address in CSF, granting you access to the server’s services and applications without being blocked by the firewall. If you encounter any issues or errors, double-check the IP address you entered and ensure that CSF is configured correctly in your WHM environment.