Table of Contents
Private nameservers, also known as custom nameservers, are nameservers that use your domain name rather than your web hosting provider’s domain name. They provide a way to brand your hosting services with your own domain name and enhance your professional image. Instead of using generic nameservers provided by your hosting company (e.g., ns1.hostingprovider.com), you can set up and use custom nameservers that reflect your domain (e.g., ns1.yourdomain.com).
Here’s how private nameservers work and their key features:
Branding:
Private nameservers allow you to brand your hosting services with your own domain name, reinforcing your brand identity and enhancing your professional image. This can be particularly beneficial if you offer hosting services to clients or run a hosting reseller business.
Control:
Setting up private nameservers gives you greater control over your DNS settings and infrastructure. You can manage your nameserver records directly from your domain registrar’s control panel, making it easier to make changes and updates as needed.
Flexibility:
Private nameservers offer flexibility in terms of DNS management and configuration. You can configure custom DNS records for your nameservers, such as A records, MX records, CNAME records, and more, to meet your specific requirements.
Consistency:
Using private nameservers ensures consistency across your hosting services and domain management. Instead of relying on different nameservers for each domain or hosting account, you can use the same custom nameservers for all your domains, streamlining your DNS management.
Professionalism:
Private nameservers can enhance the professionalism of your hosting services by providing a seamless branded experience for your clients or users. When they access your website or email, they will see your domain name in the nameserver URLs, reinforcing trust and credibility.
Setting up private nameservers typically involves the following steps:
- Register your domain name with a domain registrar if you haven’t already done so.
- Obtain a hosting account or server where you can host your nameserver DNS records.
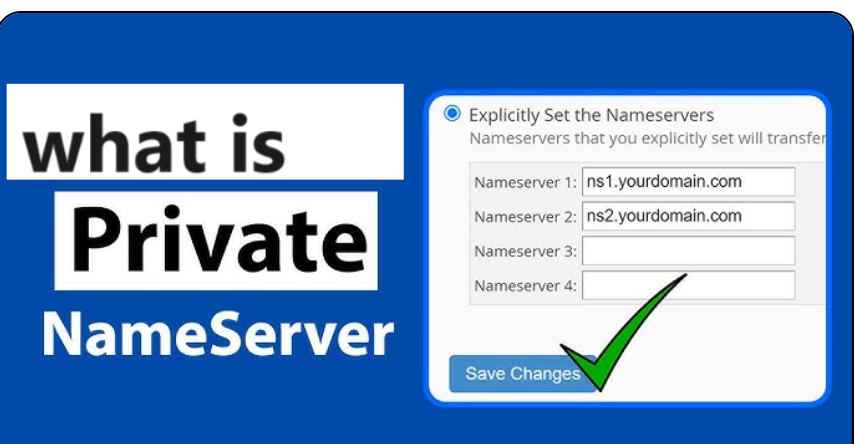
- Configure your DNS records for your custom nameservers (e.g., ns1.yourdomain.com and ns2.yourdomain.com) with the appropriate IP addresses.
- Update your domain’s DNS settings at your registrar to point to your custom nameservers.
- Allow time for DNS propagation, which can take up to 48 hours for changes to take effect globally.
Steps to set up private name servers
- Register your name servers at your registrar.
- Make sure A records exist for your registered private name servers.
- Make sure your SOA and NS records are correct (DNS glue).
All three steps must be completed correctly; otherwise, some people cannot visit your sites. For example, if the DNS glue is not set correctly, some people will be able to visit your domain, while others will not be able to reach it. In some cases, you may not need to do anything for steps 2 and 3, but you should still check to ensure it is set up correctly.
What are the benefits of having your own name servers?
Many resellers choose to have their own name servers for appearance or branding reasons. Using our anonymous name servers of ns1.websitewelcome.com and ns2.websitewelcome.com can be less professional looking for a hosting company.
Other than the look of using private name servers, when you move from one server to another, there is no need to contact all of your clients and request that they change to new name servers. Your clients will begin propagating to the new server as soon as you update your name server IP addresses. This is extremely helpful if you outgrow your Reseller account and need to upgrade to a VPS or Dedicated Server.
Once set up, you can use your private nameservers for your hosting accounts, reseller services, or any other domain-related services, providing a branded experience for your users while maintaining control and flexibility over your DNS management.